Saturday, April 14, 2018

CCR

My CCR
aka Lunar Lava Productions Instructional Video 
(the gimmick is that I tried to make it look like an instructional video on VHS) 


(in case the embedding is not working: https://drive.google.com/file/d/1O4bGXC4P38M_Q0BYEVnXGu6KfWFDXqP9/view )

Loop 1

It is finally here... it has finally come to an end...
except in a loop, there is no end (cue The Twilight Zone theme).


Short Film - Loop 1: 


(in case the embed is not working: https://drive.google.com/file/d/1AG_f7uIU9IXFfcqc6SB7XT62bR7pINA1/view)

Short Film Website: loop1film.weebly.com


Promotional Postcard: 


FRONT


BACK


Tuesday, April 10, 2018

Shoutout to all the Schedules

Remember this old thing from earlier on my blog?


This is her now!
  • Week One (2/26-3/4)
    • Finalize Script ✔
    • Storyboard ✔
    • Figure out location ✔
    • Figure out lighting and stuff✔
  • Week Two (3/5-3/11)
    • Order everything ✔
    • Assemble costumes ✔
    • Makeup and all that ✔
  • Week Three (3/12-3/18)
    • Film & Photoshoot! (16th 17th and 18th) ✔
  • Week Four (3/19-3/25)
    • Edit Film ✔
    • Work on website and postcard ✔
  • Week Five (3/26-4/1)
    • (Spring break)
    • Edit Film ✔
    • Work on website and postcard ✔
    • Work on CCR
  • Week Six (4/2-4/8)
    • Finish Editing ✔
    • Finish website and postcard ✔ (ok a day late)
    • Finish CCR
  • Week Seven
    • (Final posts by 4/14)
    • Post CCR, Film, and other elements

Thanks to Alexa and I's work ethic (towards this project at least, don't look at our other grades) we ACTUALLY followed our schedule! Crazy! We did end up switching a couple things around, adding a reshoot in, but we still managed to follow the main points we had put forward, week by week. 

So.. shout out to schedules, because without her, we wouldn't be here!


Sunday, April 8, 2018

Social Media

Alexa and I sit in our local Offerdahl's as a small child next to us very loudly repeats the same phrases about baseball. Alexa has been working on the website and the Instagram, as I investigate film festivals to submit to, and finish creating the Twitter. I have drunk 3 cups of coffee. Alexa tried to vlog this day but quickly gave up doing that in this Offerdahl's. This child won't stop talking about baseball. His parents totally forgot to order food for him. Oh my god. This kid just called his mom out for "eat[ing] way too fast". The trailer is up on Twitter! I'm going to convince Alexa to leave and go for a walk I need to get away from this child.
_________________________________________________________________________________

Okay, I'm back... it's much later and I am here to update what we've done today!

Together Alexa (spotify user: lindsay-weir) and I made a playlist, an Unofficial Official Soundtrack!


(it says who added which song, but even if Spotify didn't show it you could probably tell)

and our twitter is here, which contains both the trailer and the playlist

Friday, April 6, 2018

Website and Trailer!

Alexa has been working hard on the website, but we were struggling to determine whether we should post the full film on the website. We decided this wasn't a great idea, since we wanted to have our film go to festivals it probably would be best if it wasn't floating around online. But, there was still a spot on the website for a video so I realized what we were missing, a trailer. So while Alexa was designing out beautiful website I made this:


Our website is also coming along nicely! We are keeping with the color scheme of black and white and purple, and we are trying to make the website engaging. Alexa even left me a spot on the website to put something wierd, vague, and mysterious... don't know what I'm gonna put but I'll think of something.


The website so far!!

Tuesday, April 3, 2018

CCR Brainstorming

This weekend I hope to do the bulk of the work on my CCR, however, while Alexa seems to have an extensive creative plan for her CCR... I, right now, have nothing.

Initially, my plan was to do what I did last year, a cleanly put together slideshow in which I narrated over, explaining the different aspects of creating this project. But, alas, Alexa has inspired me to do something more interesting... and inevitably more time consuming.

After a quick brainstorm session, I came up with a brilliant idea based on a little silly video I had made earlier in the year in my film class. I would up the production effort, but to a manageable level, by creating a CCR that mimicked the look of educational VHS tapes from the 90s, like this one. Because this is a short CCR, I feel I can just use the style of art, transitions, and music in these VHS tapes without having to actually act. I want to add a little layer of fun to an otherwise informational video, which is what those educational VHS videos did best. Plus, while it's a bit of a stretch, this can tie into our main project Loop 1. We decided that our short film should exist in an ambiguous and undecided time period because we combine aspects of the 1970s as well as the present day. This CCR just adds another time period in, that of the 1990s!

Let's hope this idea works out!

a type of graphic I hope to mimic- pastiche at its finest!

Sunday, April 1, 2018

We're Done! But, It's Only The Beginning of The End.

The final draft of Loop 1 is finally done!!! After weeks of editing, we're done. But it is only the beginning of the end.

Now I/we have 12 whole days to:

  1. Make and edit a CCR
  2. Make a website for the film
  3. Finish the postcard
It's definitely do-able, but as the deadline approaches it gets more and more nervewracking. It's always crazy to me seeing an idea go from idea -> script -> storyboard -> the footage -> the edit -> the final product. But as an editor, I also feel like it's a shame I'll never be able to experience the project for the first time. I've seen it every step of the process so it's impossible for me to watch it with a fresh set of eyes. In any case, I am glad to be done... but knowing me I'm probably going to still tweak it in secret ;) 


(I'm only going to post a little teaser clip here because I don't want the blog to get confusing)

Saturday, March 31, 2018

The Postcard aka How's Alexa Holding Up

While I sit here driven insane from rotoscoping, Alexa has made progress on the other aspects of the project (namely, the postcard).


Look at the beauty! It's still a work in progress, but I love the way Alexa edited the photo on the front, and how we fixed up the font. There is still progress to be made, however, as we were talking last night that the text on the back could use some work (for example the Loop 1 on the back could use to be capitalized).


We chose to have a vertical postcard rather than a horizontal one despite the fact that this is breaking the more common convention. We did this because we felt it would help our film stand out at festivals against the sea of horizontal ones. Another reason is because this design tells our story, it shows who holds the power and it provides slight foreshadowing for the twist (that they are all the same person). The last reason I felt that a vertical card would serve us best is because of our unique choice for aspect ratio. Many films use the horizontal postcard to highlight an iconic frame from their film, but Loop 1 was shot in a 4:3 aspect ratio, meaning that it could even be perceived as confusing for us to have a horizontal card.

Friday, March 30, 2018

Self Induced Deadline Fever + The Monster Noise

April 1st. That's what I set as the unofficial deadline to finish the short film portion of this final project. I'm almost done, but I feel as if I've been almost done for more than a week now. All I have left to do, however, is color correcting and rotoscoping, and I think I can finish in time.

Now to move on to something a bit more exciting, an explanation of how we created The Monster's screech. Alexa and I wanted it to have some human voice in there, along with many inhuman noises. So one of the days we met I got a bunch of samples of Alexa making... noises. First, we started with some things The Monster would say like "I'm sorry", and then we moved on to the just plain silly (Alexa making the noise of a sheep, gargling water, etc).

Eventually, I felt we got enough sounds, and I dropped them into the Final Cut file (this was back when the project was just a baby). I had fun mixing the sounds into one fluid noise. I layered them all on top of each other, adjusted the volume, speed, and pitch of each, and even reversed some until we got our perfect screech... almost.

this is only like half of the sounds


The last couple steps included me reversing the whole thing, slowing it down a bit, and copying the front half, reversing it again, and adding it to the end.


This way I was able to make the waveform more like a bell curve, allowing it to naturally trail in and trail out... like a real screech would (probably).

the shape of the waveform I was trying to achieve
the final waveform

Sunday, March 25, 2018

The Cosmic Void or: How I Learned to Stop Worrying and Love After Effects

Before it even came time to talk about blue screens and rotoscoping, I first had to experiment to see if our vision of the Cosmic Void could be created with the tools I have at hand. I recently came into possession of After Effects, only once trying it out in order to track text onto a background.

Clueless, I found myself looking towards YouTube for an answer to my problem: How does one actually use Adobe After Effects.

Luckily, I found this video, a tutorial someone made on how to make a portal for their short film. I happened to like how the insides of their portal looked, and I figured I could adapt the technique for our own vision of the endless space abyss that would appear outside of the house.

the portal from the video tutorial I was using
I adjusted the settings, adding keyframes and motion until I got something that I was happy with. (Consulting with Alexa along the way.) Then I exported the file (which I humbly had to look up another tutorial for) and dragged it into my Loop 1 Final Cut Pro X project file. There I felt more comfortable adjusting the color, setting the highlights and mid tones to different shades of blue and purple, adding strange noise to the image and adding highlights until Alexa and I were happy.


our finished* void! ^

*of course more adjustments are bound to happen

Friday, March 23, 2018

so much for blue screens

Blue screens are wonderful, combined with modern digital keying techniques they can make an editors life easy. Simply select blue on your video editing program's keyer and watch as the background disappears!

Except, if you're not careful (or don't have the logistical time or capability to be careful), blue screens don't help much at all.

Here's the story, we want a shot of Little looking out of the door into the Cosmic Void ™. Knowing we wanted this I had three plans in place:

Plan A: We hang the blue screen outside, and it simply keys out of the picture, leaving a clean and empty background for me to underlay the Cosmic Void ™ I created.


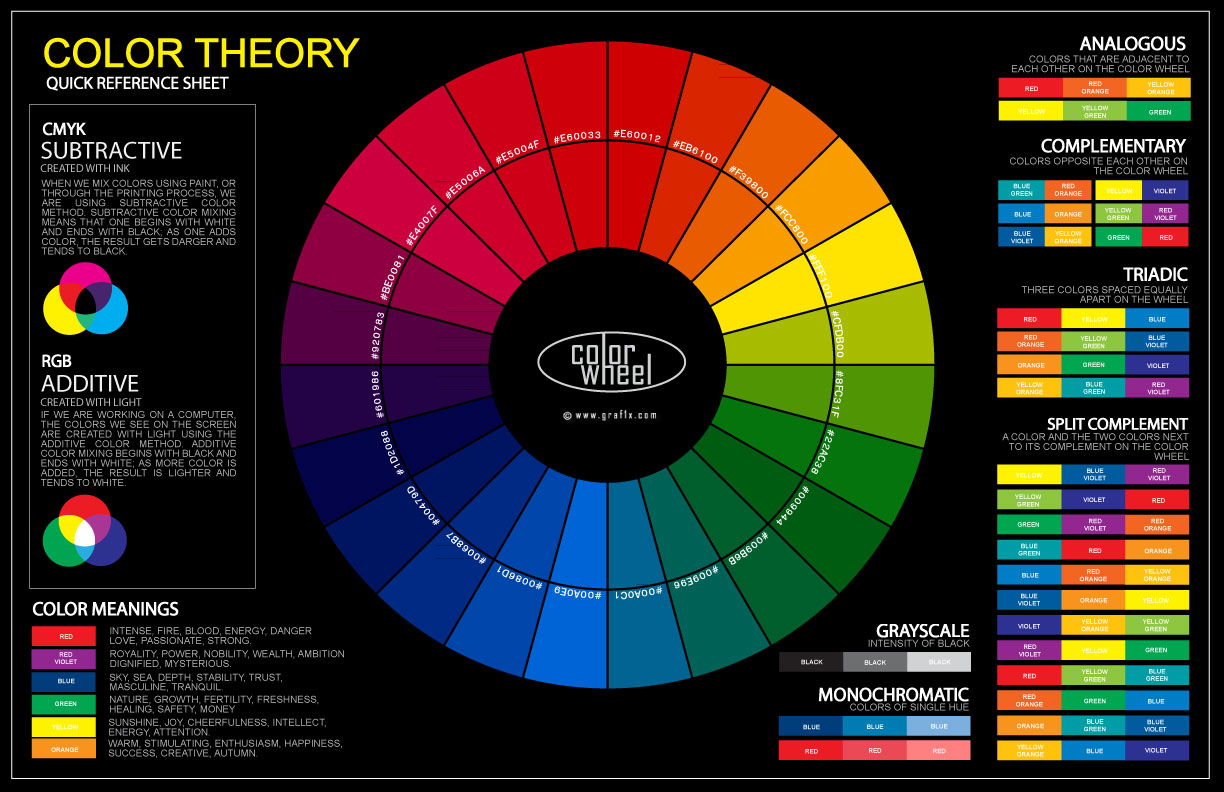
Plan B: We hang the blue screen outside, and it does NOT key out nicely (because of the lighting and distance), and I color correct the portion of the screen that Little is in (using simple tracking) to be more orange (this way her orangeness will reduce any sort of bleed or confusion when keying out the color blue which is opposite to orange on the color wheel!)


Plan C: We hang the blue screen outside, and it does NOT key out nicely (because of the lighting and distance), and I am forced to rotoscope the background out manually, cutting out the background frame by frame*.

...

Guess who's on plan C!?


But, it's actually fine... it's fine! Because, it's not actually that much to do, it took me about three hours and I've got a pretty good rough rotoscope of 1.5/4ish clips with the Cosmic Void ™ in it. I don't actually mind it too much because it's not hard, just mind-numbingly time consuming... normally I'd put on something on Netflix or YouTube while I work to make it a little more bearable. Good news is we have 11 days to edit! (I want to finish by the 31st we can potentially submit it to some film festivals!)

An example of plan A, B and C working in tandem in a later shot:


*okay... its only almost "frame by frame" because Final Cut Pro X allows me to do every other frame and it tries to fill in the blanks.

(A helpful video reference about green/blue screens that came out while I was making this post: https://youtu.be/aO3JgPUJ6iQ)

Tuesday, March 20, 2018

General Editing

Editing. It's so peaceful, interesting, and infuriating. Alexa and I are almost wrapped on production, there's only a couple of shots we need to reshoot, which means I have a lot to work with.

I started editing as I got the footage, first putting together a scene, and then adding the audio I had recorded separately on my phone with my RODE mic. This is not the way you should do it, but I am pretty competent at quickly lining up audio just from a small snippet, so this way was more convenient for me. (The more proper way would be to line up the audio in each take first, and then add them to the project.) 

As I was editing, I was quickly just adding the Black and White preset to each clip, just to get a sense of how the clips would look in the end. This helps me better diagnose any problems with flow, knowing that my problems are not coming from color difference but instead from audio problems or merely timing. Later I will go back and further color correct each shot (I have already done a few to get a sense of what we want), adding darker blacks and lighter whites (for the neo-noir look we are going for and overall for just enhancing the shots). 

When editing I tend to just use feeling to know when to move from one shot to the next, it is impossible to truly determine the place to cut. However, when I am unsure of when to cut, or what the problem with a certain cut is, I try to follow

Walter Murch's Rule of Six:

                                1. Emotion (51%)
                                2. Story (23%)
                                3. Rhythm (10%)
                                4. Eye Trace (7%)
                                5. 2D Place of Screen (5%)
                                6. 3D Space (4%)

(a more detailed description here)


Saturday, March 17, 2018

The Wagon (part 2) and Makeup


Painting day! Alexa and I painted the wagon parts! 

The Wagon Is Red!


While we were painting, my Amazon package came with my bald cap and my liquid latex! 
Next time we got together to work, Alexa and I had fun testing the makeup out.

Fake blood gel I made

A scar I made out of liquid latex and cottton! 


In order to create wrinkles, we used a method known as stretching and stippling. We knew we wanted to create a wrinkly old and gross monster on a budget, so instead of investing in a prosthetic mask that would look premade and would be way out of our budget, by stretching our actor's skin, adding liquid latex, and drying with a blow dryer, we create an interesting and pretty realistic wrinkle effect for less than $10.

the final Look™


Wednesday, March 14, 2018

Recasting and Shooting Day 1!

Saturday - Something felt off, we were set to be shooting at 5pm (we were working around our actress' work schedule). I picked up Alexa at 4, and she had some bad news. Sol felt terrible, but she flaked on us, which means we needed to find new actors. So while I was driving, Alexa was texting, and within about 5 minutes our good friend Dakota agreed to act in our final with her younger sister Jade. Problem solved; however, with it, we had to compromise slightly. Jade is 5 years older than our previous actor for the role, but we figured some movie magic would fix that (costuming), plus an older actor usually means a better actor (and Jade does Drama in her middle school which is an even bigger plus). So Alexa and I decided to take the extra day to prep, and Jade and Dakota agreed excitedly to start filming at 9 a.m. the next day.


Jade and Dakota

Sunday - I woke up at 7:30, tired but happy; I'm not a morning person, but when it comes to shooting days I feel much better starting super early rather than starting in the afternoon or evening. I drove to my local Dunkin Donuts to pick up some breakfast for my actors, as a payment and a thank you, and my morning energy and happiness was powered by an excitement to sit down with a donut and a hot cup of coffee, ready to film. We filmed until 1:00, finishing a huge chunk of our project (about 2 out of the 5 minutes), and then I got to editing.


a tiny video of Alexa directing and being the DOP


Me after the tiring emotional rollercoaster of a weekend.

Tuesday, March 13, 2018

Storyboard, Thanks Alexa!

Alexa straight up just made a 72-panel storyboard! I love it! Last week in class and during lunch, Alexa went over each shot with me and I helped her edit and add a couple panels. But for the most part, we were on the same page. She created a beautiful storyboard, which makes me feel good about what stage of the project we are on. Storyboards always relax me, as they let me know everything we have to shoot. As an editor, knowing that we have an organizational method to get all the shots we need to get, comforts me.


I thank Alexa for making this storyboard, she came up with some really cool and visually interesting shots. I think we work so great as a group because she has more experience and interest the aspects of this projects that I find more tedious, and vise versa.

Some of these shots I'm not even ready for, that's how beautiful they'll be!

Monday, March 12, 2018

Aspect Ratio

When considering which aspect ratio to use for Loop 1 we have a few options: The standard 1.85:1, a more cinematic 2.35:1, or the aspect ratio of the original The Twilight Zone episodes, 1.33:1.

After discussion, Alexa and I decided we liked the look of the 1.33:1 aspect ratio the best, It matches the other stylistic choices we are making (the black and white). I think it fits the tone of a nostalgic and weird television show that we are going for. (Below are some examples of what I mean):

Above is an example of the 1.33:1 aspect ratio in The Twilight Zone

Another example from Twin Peaks

Example from Star Trek: The Next Generation

Example from The X Files

Perhaps we will do something like this (a shot from Oz the Great and Powerful), where we use a 1.33:1 aspect ratio, but have certain elements pop out of that frame, creating an almost 3D effect (probably not though, we can't think of a place it would be particularly effective to use it).


Just another little detail that Alexa and I finally got figured out! =)

A shot from the very first draft of our film, using this aspect ratio


“Shapeshifting Films.” Sanctuary Moon, 3 May 2017, www.tadleckman.wordpress.com/2012/10/29/shapeshifiting-films/

Friday, March 9, 2018

Location Troubles and Solutions

I think by far the biggest obstacle in this project has been planning the location, we've gone through Plan A's, Plan B's and Plan C's trying to find a place where we can shoot. By popular demand (a.k.a. my insistance) we are going with Plan D: The scenes by the door will be filmed at our friend Daniel's house, and the rest will be filmed at my house.

I say "by my insistance" because the alternative would be to film at Alexa's grandmother's house which is half an hour away, and as the one driving, I say no. Hopefully these two locations blend seamlessly (I will make sure of it in post), but I know that it is better than wasting over an hour each shooting day in transportation. What is reassuring me is the fact that we are deciding to shoot so early (relatively), because in the worst case scenario we can reshoot anything we need.

Well, time for me to do the very fun task of cleaning out my room, removing everything from my walls and adding in extra lights. By tomorrow night I should be sleeping on the set of Loop 1!

P.S. All this talk about location and production is just making me all the more excited to edit. The stress of this weekend will be calmed by the prospect of looking at all of our footage in a comfortable environment and getting to put it all together at last!

Character, Casting, and Costume Design

Characters:

Our film is a little odd, because technically all the characters are the same. However, because of the age gap they all act differently. Little is the youngest, she is naive and spunky. Middle is nine years older, she has been left alone to fend for herself; she has made her own clothes and has started to scheme and figure out her situation, taking charge when the rest of the versions of her have given up. We as an audience do not get more than a glimpse of The Monster's personality, it's motivations aren't clear until the end. Middle and Little are afraid of The Monster, but that was her purpose. She knows that the only way out, however cruel, is to stop the loop at the root. The Monster is 927 at this point in the story, kept alive by the universe/house, living out this meaningless life.

Little: Brave, but untrusting. Snarky, out loud; a little ball of aggression.
Middle: Hair in bun! Selfish, thinks she knows what’s best.
Monster: Chaotic good, painted as chaotic evil. Probably ugly :( .

Our design for The Monster


Casting:
Little - Sophie Weman
Middle - Sol Weman
Monster - Sol, Sandra, and Alexa

Sophie (left) and Sol (right)


Costume:

From the beginning we knew we needed Little to look like a Girl Scout, but we weren't sure what style of uniform we were going to try to find. I got lucky, and when my family was cleaning out my grandmother's house, they found this old Girl Scouts' vest which was my Aunt's in the 70's.

The vest

My friend Daniel holding up the skirt we chose for Little.

Below are the robes (works in progress) that Middle and The Monster will be wearing. These are made from the curtains that were in the house, after Middle outgrew her girl scouts uniform.


Wednesday, March 7, 2018

The Wagon (part 1)


When looking at what Alexa and I need to buy, one of the first problems that arose is: we don't have that much money to spend on this project. I was looking on Amazon, to purchase the liquid latex and bald cap needed for The Monster, and I found myself browsing the wagons. One of the most important props in this piece is the wagon; Alexa and I had planned to get lucky and find an old wagon at a local thrift store, but I wasn't too hopeful. Therefore, I sat scrolling through the wagons on Amazon, sorting by "Price Low to High", not ecstatic about what I saw.


And, the wagon that was in our budget, we felt was way too small.


So we were left with two options: hope that a thrift store in the area has a wagon that meets our needs/vision, or make our own.

I really didn't think we were going to find a wagon at any thrift store nearby, so I began to research d.i.y. options.

Wikihow's answer was not very helpful, it was too complicated and not enough like what we initially envisioned. However, several websites later I found the blog Rain on a Tin Roof, which gave instructions on how to make a wagon out of a crate and PVC pipe. This wasn't quite what we wanted either but it was a step in the right direction. It was enough of a step that I thought, "I probably have some materials in my house, why don't I try to look around see what I can find." And then I thought, "I do have some stuff maybe I can get something started." And then I thought:


I'm lucky that my house is just filled with random, useful, trash (though isn't everything just useful trash). I happened to have an old base with wheels, some old plastic drawers from a storage thing my family was about to get rid of, and some PVC pipes from an old marshmallow launcher my brother made years ago in Boy Scouts.


the wheely base with the drawers

dismantled the marshmallow launcher
my dad helping me cut a piece of PVC pipe


wagon handle!

It took me 31 minutes to make this work of art =)
(sorry for the vertical video and also please ignore my little feet!)


The next step in the process is to reinforce the duct-taped areas of the PVC tape and then... paint! Alexa is super excited to paint it, as am I!